Nikon P900 Instruction Manual: A Comprehensive Guide
This guide unlocks the full potential of your Nikon COOLPIX P900, offering detailed instructions and insights. Download the PDF reference manual from Nikon’s website for expanded knowledge.
Explore advanced features, troubleshooting tips, and warranty details, ensuring a seamless photographic experience with your new superzoom camera.
Welcome to the world of superzoom photography with the Nikon COOLPIX P900! This powerful camera boasts an incredible 83x optical zoom, allowing you to capture distant subjects with remarkable clarity. This manual serves as your comprehensive guide, designed to help you master every feature and function.
Nikon has meticulously crafted the P900 for both beginners and experienced photographers, offering a blend of user-friendly automation and full manual control. Explore its 16-megapixel CMOS sensor and built-in Wi-Fi/NFC connectivity for seamless image sharing. Prepare to unleash your creativity!
Understanding the Camera’s Key Features
The Nikon P900 distinguishes itself with a phenomenal 83x optical zoom lens, covering an expansive 24-2000mm equivalent range. Its 16-megapixel CMOS sensor delivers high-resolution images, even in challenging lighting conditions. Integrated Wi-Fi and NFC connectivity enable effortless wireless transfer to smartphones and tablets via the Nikon Connect Mobile App.
Furthermore, the camera supports 7fps continuous shooting and boasts a versatile array of shooting modes, catering to diverse photographic scenarios. Explore these features to unlock the P900’s full potential.
The 83x Optical Zoom Lens
The P900’s defining characteristic is its incredible 83x optical zoom, equivalent to a 24-2000mm range. This allows capturing distant subjects with remarkable clarity, eliminating the quality loss associated with digital zoom. The lens features a bright F2.8 aperture at the wide end, ideal for low-light photography, and F6.5 at the telephoto end.
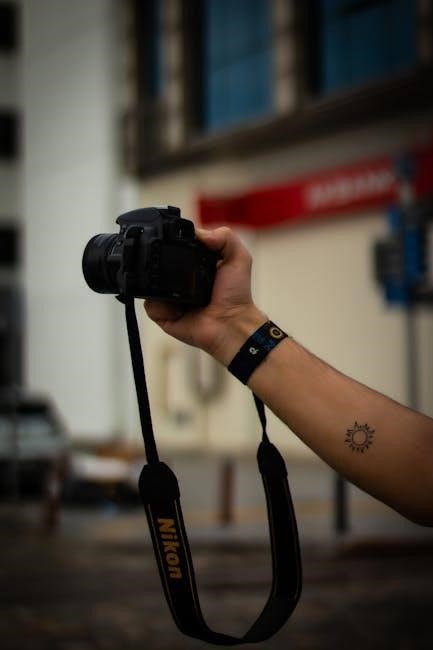
Mastering this zoom range requires a steady hand or tripod, especially at maximum extension, to avoid image blur. Utilize the zoom controls effectively for stunning results.
16 Megapixel CMOS Sensor
The Nikon P900 incorporates a 16-megapixel CMOS sensor, delivering high-resolution images with excellent detail and vibrant colors. This sensor size balances image quality with the demands of a superzoom lens. It enables capturing sharp photos even when cropping or enlarging images for prints.
The sensor’s performance is further enhanced by Nikon’s image processing engine, minimizing noise at higher ISO settings, crucial for low-light shooting scenarios.
Built-in Wi-Fi and NFC Connectivity
The Nikon P900 features integrated Wi-Fi and NFC (Near Field Communication) for seamless wireless connectivity. Utilize the Nikon Connect Mobile App to transfer photos and videos to your smartphone or tablet for easy sharing on social media platforms.
NFC allows instant pairing with compatible devices with a simple touch, streamlining the connection process. Remote camera control is also possible via the app, offering creative shooting options.
Getting Started: Initial Setup
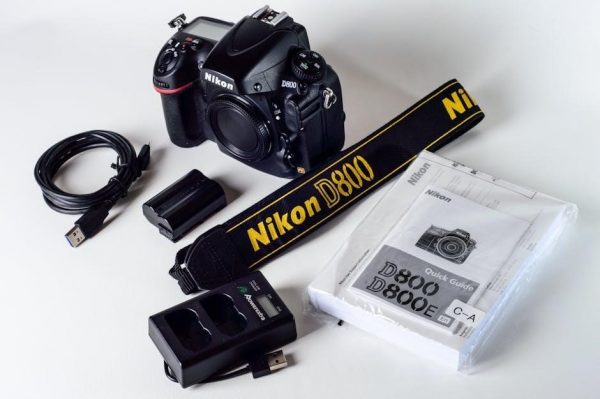
Before your first adventure with the Nikon P900, proper initial setup is crucial. Begin by carefully inserting a compatible SD memory card into the designated slot to store your photos and videos. Next, insert the fully charged battery into its compartment, ensuring a secure connection.
Finally, power on the camera and follow the on-screen prompts to set the correct date, time, and preferred language for a personalized experience.
Inserting the Battery and Memory Card
Locate the battery compartment door on the camera’s bottom. Open it and insert the Nikon EN-EL24 battery, ensuring the contacts align correctly. Securely close the door. Next, find the SD card slot, typically near the battery compartment. Insert a compatible SD card (SDHC/SDXC) label-side up until it clicks.
Confirm the card is properly seated before powering on the camera to avoid potential issues with image storage.

Charging the Battery
Connect the supplied USB cable to the camera’s USB port and a USB power adapter. Alternatively, use a computer’s USB port. The battery indicator lamp will illuminate, typically red while charging. Allow several hours for a full charge – approximately 4 hours is recommended.
The lamp usually turns off or changes color (often green) when charging is complete. Avoid interrupting the charging process for optimal battery life.
Setting the Date, Time, and Language
Access the camera’s setup menu via the menu button and navigate to the date/time settings. Use the directional pad to adjust the year, month, day, hour, and minute. Confirm each selection to proceed. Similarly, locate the language settings within the menu.
Choose your preferred language from the list provided. Proper date and time settings are crucial for accurate image timestamps and organization.
Basic Camera Operations
Familiarize yourself with the power button’s location for quick activation and deactivation of the camera. Navigate the menu system using the directional pad and OK button for selections. Utilize the mode dial to switch between Auto, Scene, and Manual shooting modes.
Mastering these fundamental operations is key to unlocking the Nikon P900’s full potential and enjoying a smooth shooting experience.
Powering On and Off

To power on the Nikon P900, locate the power button, typically found on the top panel of the camera. Press it firmly until the LCD screen illuminates, indicating the camera is active. To power off, repeat the process – press and hold the power button until the screen goes dark.
Ensure the camera is fully off to conserve battery life when not in use, preventing accidental operation or power drain.

Navigating the Menu System
Access the Nikon P900’s menu by pressing the ‘Menu’ button. Use the directional pad or control dial to navigate through the various menu tabs – Setup, Shooting, Custom Settings, and more. Select options by pressing the ‘OK’ button.
Explore each menu to customize camera settings, adjust image quality, and configure features to suit your shooting preferences. Refer to the full manual for detailed explanations of each setting.
Using the Mode Dial
The mode dial, located on top of the camera, allows quick selection of shooting modes. Options include Auto, Scene, P, S, A, M, and Movie modes. Auto mode simplifies settings for beginners, while Scene modes optimize for specific situations.
P, S, A, and M offer increasing levels of manual control. Rotate the dial to your desired mode and begin capturing stunning images with your Nikon P900.
Shooting Modes Explained
The Nikon P900 offers diverse shooting modes to suit every photographer. Auto mode is ideal for beginners, automatically adjusting settings for optimal results. Scene modes, like Portrait, Landscape, and Sports, optimize for specific subjects.
Manual mode grants full control over aperture, shutter speed, and ISO, empowering experienced users. Experiment with each mode to unlock the camera’s full potential and capture breathtaking images.
Auto Mode for Beginners
Auto mode simplifies photography, making it perfect for newcomers to the Nikon P900. The camera intelligently analyzes the scene and automatically selects the optimal settings for exposure, focus, and white balance. Simply point and shoot to capture stunning photos without needing technical expertise.
This mode is ideal for everyday snapshots, ensuring consistently good results in various lighting conditions, allowing you to focus on composition and creativity.
Scene Modes: Portrait, Landscape, Sports, etc.
The Nikon P900 offers diverse scene modes tailored for specific shooting situations. Portrait mode enhances skin tones, Landscape optimizes for expansive views, and Sports mode freezes action with faster shutter speeds. Other options include Night Landscape, Party, Beach, and Snow, each pre-configured for optimal results.
These modes simplify complex settings, allowing you to achieve professional-looking photos effortlessly, even without manual adjustments.

Manual Mode: Full Control Over Settings
Manual mode empowers experienced photographers with complete control over aperture, shutter speed, and ISO sensitivity. This allows for precise adjustments to achieve desired creative effects, such as depth of field and motion blur. Mastering manual mode unlocks the P900’s full potential.
Experiment with settings to understand their impact on image quality and develop your unique photographic style, surpassing the limitations of automatic modes.
Focusing and Exposure
Achieve sharp, well-exposed images by understanding the P900’s focusing and exposure controls. Utilize autofocus modes like single, continuous, and face detection for varied shooting scenarios. Exposure compensation adjusts brightness, while ISO sensitivity controls light sensitivity.
Fine-tune these settings to overcome challenging lighting conditions and capture stunning photographs with optimal clarity and detail, enhancing your creative vision.
Autofocus Modes: Single, Continuous, Face Detection
The Nikon P900 offers versatile autofocus options. Single AF is ideal for stationary subjects, locking focus upon activation. Continuous AF tracks moving subjects, maintaining sharpness during action. Face detection prioritizes faces within the frame, ensuring clear portraits.
Select the appropriate mode based on your subject and shooting scenario for consistently focused and captivating images.
Exposure Compensation
Exposure compensation allows you to fine-tune the brightness of your images. If your photos are too dark, increase the compensation value; for overly bright images, decrease it. This feature overrides the camera’s automatic settings, giving you creative control.
Utilize the +/- button to adjust the compensation in steps, achieving the desired exposure for perfectly balanced and visually appealing photographs.
ISO Sensitivity Settings
ISO controls your camera’s sensitivity to light. Lower ISO settings (e.g., 100) are ideal for bright conditions, producing cleaner images with minimal noise. Higher ISO settings (e.g., 3200) are useful in low light, but may introduce more grain or noise.
Experiment with different ISO levels to balance image brightness and quality, optimizing your photos for various shooting scenarios.
Advanced Features and Settings
Unlock the P900’s full potential with customizable settings! Explore the Electronic Viewfinder (EVF) for precise framing, and tailor button functions to your shooting style. Master white balance adjustments for accurate color rendition in diverse lighting conditions.
Dive into menu options to refine image parameters and personalize your camera experience, achieving professional-quality results.
Using the Electronic Viewfinder (EVF)
The P900’s Electronic Viewfinder (EVF) provides a clear, bright view, even in direct sunlight. Activate it via the camera settings for precise composition and framing. Adjust the EVF’s brightness and diopter for optimal viewing comfort.
Benefit from real-time exposure preview and helpful shooting information displayed directly within the viewfinder, enhancing your photographic control and accuracy.
Customizing Button Functions
The Nikon P900 allows personalized control by assigning frequently used functions to various buttons. Access the customization menu through the camera settings to tailor the button operations to your shooting style.
Streamline your workflow by directly accessing features like ISO, white balance, or autofocus modes, enhancing efficiency and responsiveness during critical shooting moments. Create a truly personalized experience.
Understanding White Balance
White balance ensures accurate color rendition under diverse lighting conditions. The Nikon P900 offers preset modes like Daylight, Cloudy, and Fluorescent, alongside a customizable setting for precise adjustments.
Incorrect white balance results in color casts; mastering this setting is crucial for natural-looking photos. Experiment with different modes to achieve optimal color accuracy, enhancing the overall quality of your images.
Connectivity and Data Transfer
The Nikon P900 facilitates seamless data transfer via USB to your computer, enabling image and video management. Alternatively, utilize the Nikon Connect Mobile app for wireless transfer to smartphones and tablets.
Wi-Fi options streamline sharing to social media or cloud storage. Explore these connectivity features to effortlessly back up, edit, and share your captured memories with friends and family.
Connecting to a Computer via USB
To connect your Nikon P900 to a computer, use a USB cable. Ensure the camera is powered off before connecting. Select “USB” on the camera’s output options after powering on while connected.
Your computer will recognize the camera as a storage device, allowing you to easily transfer photos and videos. Remember to safely eject the camera from your computer before disconnecting the USB cable.
Using the Nikon Connect Mobile App
The Nikon Connect Mobile app facilitates wireless image transfer and remote camera control. Download and install the app on your smartphone or tablet. Pair the app with your P900 via Wi-Fi or NFC.
Once connected, you can browse, download, and share photos directly from your camera. Additionally, the app allows remote shooting, offering live view and control over camera settings.
Wi-Fi Transfer Options
The Nikon P900 offers several Wi-Fi transfer methods for seamless image sharing. Utilize the Nikon Connect Mobile app for direct transfer to smartphones and tablets. Alternatively, connect to a Wi-Fi network and upload images to cloud services.
Direct transfer to compatible smartphones is also possible via Wi-Fi Direct, bypassing a router. Ensure your device supports these protocols for optimal connectivity and efficient file sharing.
Troubleshooting Common Issues
If your Nikon P900 fails to power on, check the battery charge and ensure proper insertion. For image quality problems, verify settings like ISO and focus. Wi-Fi connection difficulties can often be resolved by restarting both the camera and your mobile device.
Consult the full reference manual PDF for detailed solutions and further assistance with these and other potential issues. Nikon support is also available for complex problems.

Camera Not Powering On
First, confirm the battery is fully charged using the provided charger. Next, ensure the battery is correctly inserted into the camera compartment, checking for proper contact. If the issue persists, try a different, known-working battery if available.
Refer to the PDF manual for detailed battery installation instructions and troubleshooting steps. A faulty battery or incorrect insertion are common causes of this problem.
Image Quality Problems
If images appear blurry, verify the lens is clean and free of smudges. Ensure you’re using the appropriate autofocus mode for your subject – single for static, continuous for moving. Check ISO settings; higher ISOs introduce noise.
Consult the PDF manual for optimal settings based on shooting conditions. Experiment with exposure compensation to correct over or underexposed photos, improving overall image quality.
Wi-Fi Connection Issues
If connection fails, confirm your smartphone and camera have Wi-Fi enabled. Ensure you’re selecting the correct network and entering the password accurately. Restart both devices and attempt the connection process again using the Nikon Connect Mobile App.
Refer to the PDF manual for detailed Wi-Fi setup instructions. Check for app updates and ensure compatibility with your device’s operating system for optimal performance.
Downloading the Full Reference Manual (PDF)
Access the comprehensive Nikon COOLPIX P900 Reference Manual in PDF format directly from the Nikon imaging website. This detailed guide provides in-depth explanations of all camera functions and settings. Download it for expanded knowledge and troubleshooting assistance.
The manual is available in multiple languages, offering a wealth of information to enhance your photographic experience. Utilize free Adobe Reader software to view the PDF file easily.
Nikon Manual Viewer App
Enhance your learning experience with the Nikon Manual Viewer 2 app, compatible with iPhones, iPads, iPod touch, and Android devices. This convenient application provides quick access to your P900’s digital manual on the go. Enjoy interactive features and easy navigation.
The app streamlines access to information, eliminating the need to carry a physical copy. Download it today for a more immersive and user-friendly manual experience.
Technical Specifications of the P900

The Nikon COOLPIX P900 is a compact digital camera boasting a 16MP sensor and an incredible 83x optical zoom, equivalent to 24-2000mm. It features an aperture range of F2.8-6.5, offering versatility in various lighting conditions. Capture stunning videos with its capable video recording features.
Explore detailed specifications, including sensor type and resolution, on Nikon’s official website and within the comprehensive reference manual.
Sensor Type and Resolution
The Nikon P900 utilizes a 16 megapixel CMOS sensor, delivering high-resolution images with impressive detail and clarity. This sensor size balances image quality with the camera’s compact design. Expect vibrant colors and reduced noise, even in challenging lighting scenarios.
Benefit from the sensor’s capabilities for both still photography and video recording, ensuring exceptional results across various shooting conditions.
Zoom Range and Aperture
The Nikon P900 boasts an incredible 83x optical zoom, equivalent to a 24-2000mm focal length. This expansive range allows for capturing distant subjects with remarkable clarity. Its aperture varies from f/2.8 at the widest angle to f/6.5 at full zoom.
Understand that a narrower aperture at longer zoom lengths impacts light gathering, potentially requiring higher ISO settings for optimal exposure.
Video Recording Capabilities
The Nikon P900 records high-definition 1080p Full HD video at up to 60 frames per second, ensuring smooth and detailed footage. It supports various recording sizes and frame rates to suit different needs. Utilize the powerful zoom during video recording, though image stabilization is crucial.
Remember that extended zoom usage during video may introduce slight instability; a tripod is recommended for professional-looking results.
Important Safety Precautions
Always avoid exposing the camera to extreme temperatures, humidity, or direct sunlight for prolonged periods. Never attempt to disassemble or repair the camera yourself; contact Nikon authorized service personnel. Keep the camera and accessories out of reach of small children.
Do not use the camera near flammable gases or liquids. Handle the battery with care, avoiding short circuits or exposure to fire. Follow all warnings and cautions in the manual.
Declaration of Conformity (DoC)
Nikon hereby declares that the COOLPIX P900 radio equipment type is in compliance with relevant directives. Access the full Declaration of Conformity PDF document at imaging.nikon.com/support/pdf/DoC_P900.pdf. This document details adherence to applicable standards.
Maximum radio frequency power output is specified within the DoC. Compliance ensures the camera meets regulatory requirements for operation within designated regions, guaranteeing safe and legal usage.
Warranty Information
Nikon provides a limited warranty for your COOLPIX P900, covering defects in materials and workmanship. Review the complete warranty details for specific terms, conditions, and duration of coverage. Contact Nikon Support for assistance with warranty claims or service requests.
This warranty ensures peace of mind, protecting your investment against manufacturing flaws. Proper registration of your camera may be required to validate warranty eligibility, so retain your proof of purchase.
Nikon’s Limited Warranty
Nikon’s limited warranty safeguards against defects in materials and workmanship for a specified period from the date of purchase. This doesn’t cover damage from misuse, accidents, or unauthorized repairs. Carefully review the full warranty document for complete details and exclusions.
To obtain warranty service, contact Nikon Support with proof of purchase. The warranty ensures your P900 is free from manufacturing flaws under normal use conditions.
Contacting Nikon Support
For assistance with your Nikon P900, visit the official Nikon website’s support section. There you’ll find FAQs, troubleshooting guides, and contact information for their customer service team. You can reach them via phone or online chat for personalized support.
Nikon provides resources to address any issues you may encounter, ensuring a positive experience with your camera. Don’t hesitate to reach out for help!